 The product I have chosen to investigate is the Kodak EasyShare V610 Digital Camera. My reasons for chosing this are that it's a portable device that has a multimedia interface.As I’d only purchased the camera the day before I was given this breif I had no prior knowledge of its functionality, interface or the location of the buttons essential for operating the camera.
1. THE PRODUCT AND ITS FUNCTIONALITY
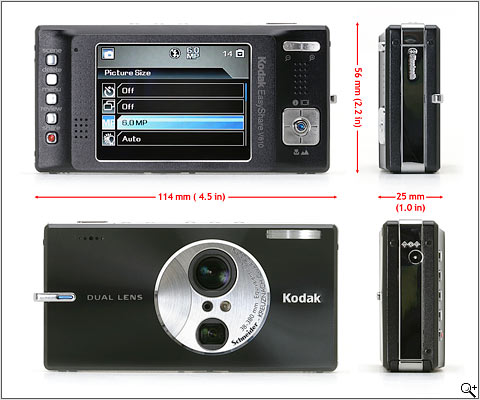
The Kodak Easyshare V610 is a well built digital camera with a high quality slim metal body and controls. The camera uses Kodak Retina Dual Lens technology the two lenses give it a total focal range of 38 - 380 mm (10x optical zoom) and it boasts a 2.8inch high resolution (230,000 pixels) LCD screen and 28MB internal memory. There’s also wireless Bluetooth onboard so photos can be shared instantly with P.D.A’s , mobile phones, P.C’s and Picture Kiosks. The camera has Easyshare which means it can be connected direct to a Kodak printer dock without the need for a p.c.
The Kodak V610 takes photos either in a chosen pre programmed mode eg auto, sport, night-time etc or can be programmed to suit your needs with desired flash and aperture settings. The camera also shoots videos It is designed to be used in many different environments, there are modes for indoor / outdoor , sunny and snow. As it’s purely a point and shoot camera it’s interface is not overloaded with external controls.
2.THE INTERFACE
Figure 1. The top veiw of the camera

The top plate of the camera (fig 1) is home to the shoot (shutter release), flash mode and main power switch. To the left of these are three mode buttons giving one-touch access to stills (auto), movie and favourites modes. You can see at a glance what mode you are shooting in as the three mode buttons have a blue light inside them.
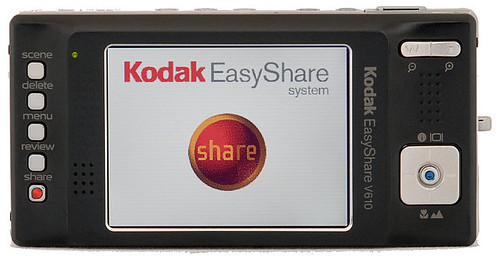
The rear right of the camera (fig 2) hosts a navigation pad and centre button combination which controls the display, scene and landscape modes and to change exposure. It is also used for zooming and selecting pictures in review mode. Above this is the zoom contol which is used for zooming in/out whilst shooting.
FIGURE 2
Scene
This button displays a tidy screen of Scene options. Three rows of Scene icons are neatly arranged in the bottom half of the screen, leaving the top half available for a text explanation of the currently selected one. Options in this mode are Portrait, Panoramic L-R, Panoramic R-L, Sport, Landscape, Close-up, Night Portrait, Night Landscape, Snow, Beach, Text, Fireworks, Flower, Manner/Museum, Self-portrait, Party, Children, Backlight, Panning Shot, Candle light, Sunset, and Custom preset shooting modes.
Delete
This button calls up the Delete menu in Review mode. You can delete individual images or all images on the card. There's also an option to cancel.
Menu
This button displays the settings menu in Playback or Record modes.
Review
This button activates Playback mode when pressed in any Record mode. Once in Playback mode, pressing the button again, or the
Shutter button, returns to the Record display..
Share
This button lets you tag images for printing, emailing, or as a favourite image. (The metaphor of a heart appears on "favourite" images).
Pressing this button in Record mode automatically enables Playback mode, and displays the Share menu with the following options:
E-Mail: E-mails a low-resolution copy of the image to a recipient, based on a saved address book.
Favourite: Marks the current image as a "favourite."
Bluetooth: Accesses the Bluetooth controls, allowing you to send images and set up Bluetooth options.
Print All: Sets the camera to print all images, and allows you to set how many copies.
Cancel Prints: Clears all checkmarks from images currently marked for printing.
Select All: Allows you to quickly select all images for printing, emailing, sending to Favourites, or sending via Bluetooth.
The camera follows the 9 step guidelines set out by Jakob Neilson
- The camera uses simple and natural dialogue - All the displayed messages are easy for even a technophobic person to follow
- The camera speaks the user's language - Icons of common metaphors are used in the menus. In particular the scene menu uses metaphors for icons (fig 3) for the following Shooting modes
Auto
Figure 3
• Portrait
• Panorama left-right
• Panorama right-left
• Sport
• Landscape
• Snow
• Beach
• Text
• Fireworks
• Flower
• Manner/Museum
• Self portrait
• Party
• Children
• Back light
• Panning shot
• Candlelight
• Sunset
• Custom
• AE compensation +/- 2.0EV in 0.3EV steps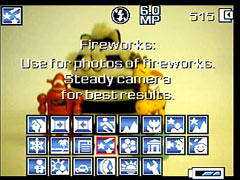 A metaphor of a runner is is used to symbolise sport mode and moving targets. A tulip is used to symbolise taking close up pictures. This a common metaphor used on digital camera. Amoving car is used for panning mode.
 - Minimise user memory load
- There is good screen management and different users abilities have been taken into account in its design.
- The cameras interface provides feedback at every stgep. Conversing with user so that they know they are following the correct procedure for what function is desired.
- The exits are clearly marked and it is easy to navigate your way through the menus
- The error messages are clear and informative
- When a selectable mode is active it is displayed at the top of the interface.
- Prevent errors
3a. STEPS AND ACTIONS REQUIRED FOR CHOSEN TASK
I used Norman's Action - cycle model for this task
Goal: To send a photo via Bluetooth from my camera to my mobile phone
Task:
- Locate photo on camera I wish to send
- Activate blue tooth on my mobile phone
- Find device (mobile phone) with my cameras bluetooth
- Choose image size
- Send photo to mobile phone
- Receive photo on my mobile phone
- Press review button on camera
- Use < > keys on the navigation pad to scroll through and locate image
- Select image by pressing OK button
- Press the share button
- Use navigation pad to scroll down to the Bluetooth menu
- With the Bluetooth menu highlighted press OK
- message displayed "camera is searching for devices
- All devices that are displayed are then shown
- Use navigation keys to highlight my mobile phone device
- Press OK
- Select size - QVGA - fast transfer by highlighting it in the transfer menu
- Press OK
- message displayed "sending to device mobile phone" displayed
- Accept transfer on my phone
- message displayed "sent to mobile phone
I found the task relatively easy to carry out as it was not the first digital camera I have operated. I used my prior knowledge, common sense and the recognition of metaphor to assist me. I knew from previous knowlege that pressing the review button would show me all the pictures that were stored in my cameras memory. Common sense told me i'd have to press the share button to carry out the task. The Bluetooth option had the familiar metaphor of a network icon which is commonly used for this hardware. I used my prior knowledge take from the similar task of sending photos from mobile phone to mobile phone with Bluetooth to assist me with the transfer.


No comments:
Post a Comment